Single Sign-On (SSO) enables the user to pass seamlessly from a provider’s application into the InstaMed environment .
Features and Benefits
- Use your account, no additional login or sign-up required
- Embed InstaMed screens within your application
- Pre-populate fields to reduce data entry
- Authentication token is only good for 15 minutes
Supported Formats
- SAML 2.0
- HTTP post binding only
- RSA Encryption with X.509 certificates
- Signature-verification with X.509 certificates
- Name Value Pair (NVP)
Required Fields
- relayState – Populated with one of the Target URLs
- accountId – InstaMed account ID
- securityKey – Secret password
- ssoAlias – Maps to a group
Portal Display Modes
InstaMed user interface screens can be displayed in one of three modes:
- Embedded iFrame – iFrame within main page
- Pop-up Window – Separate browser window
- Incontext iFrame – Modal window in front of the main page
Explore interface display options, code examples, and implementation details using the wizard below.
Return URL
When finished with an action on a user interface screen, the user can be taken to a specific URL.
returnURL: InstaMed will simply redirect the current page to a specific URL on the client-side when the user clicks Close or Cancel.
returnUrlUpdateParent: Update parent window. Recommended for Embedded iFrame. Set the value to ‘parent’ to update the parent page.
cancelUrl or confirmUrl: Instead of supplying a single ReturnURL, a CancelURL and ConfirmURL can both be supplied. InstaMed will use the cancel URL when the user cancels a payment and the confirm URL when the user processes a payment.
Integration Options
Client to Server SAML
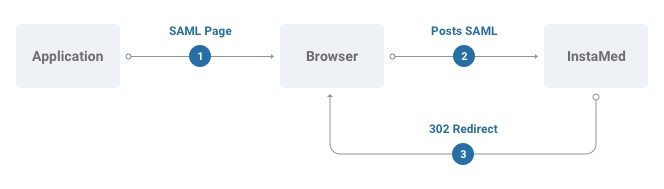
- Application generates SAML post page
- User’s browser submits SAML form to InstaMed
- InstaMed authenticates user and redirects the user’s browser to the target url (relayState) with token
Client to Server HTTP POST
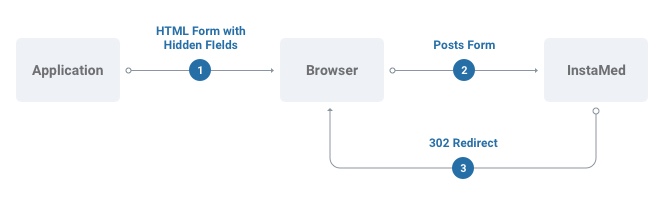
- Application generates HTML form with hidden input fields
- User’s browser submits SAML form to InstaMed
- InstaMed authenticates user and redirects the user’s browser to the target url (relayState) with token
Server to Server NVP
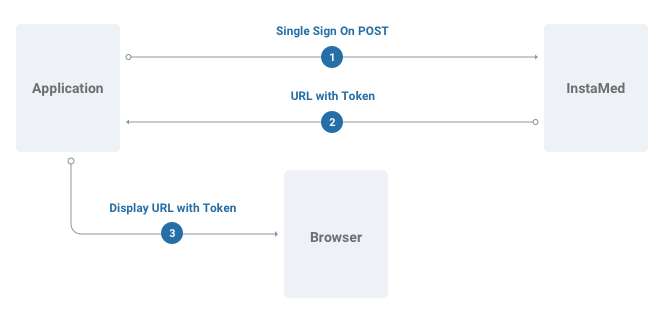
- Application sends HTTP Post directly to InstaMed (NOTE: make sure to URL encode parameter values for SSO NVP)
- InstaMed authenticates user and returns target url (relayState) with token
- Application navigates User’s browser to URL